How It Works
Create beautiful celebration books in just a few simple steps. From setting up your book to sharing it with loved ones.
Create Book
Start a new book project
Customize
Choose category & template
Create Pages
Manually or with AI
Share & Enjoy
Invite friends or publish
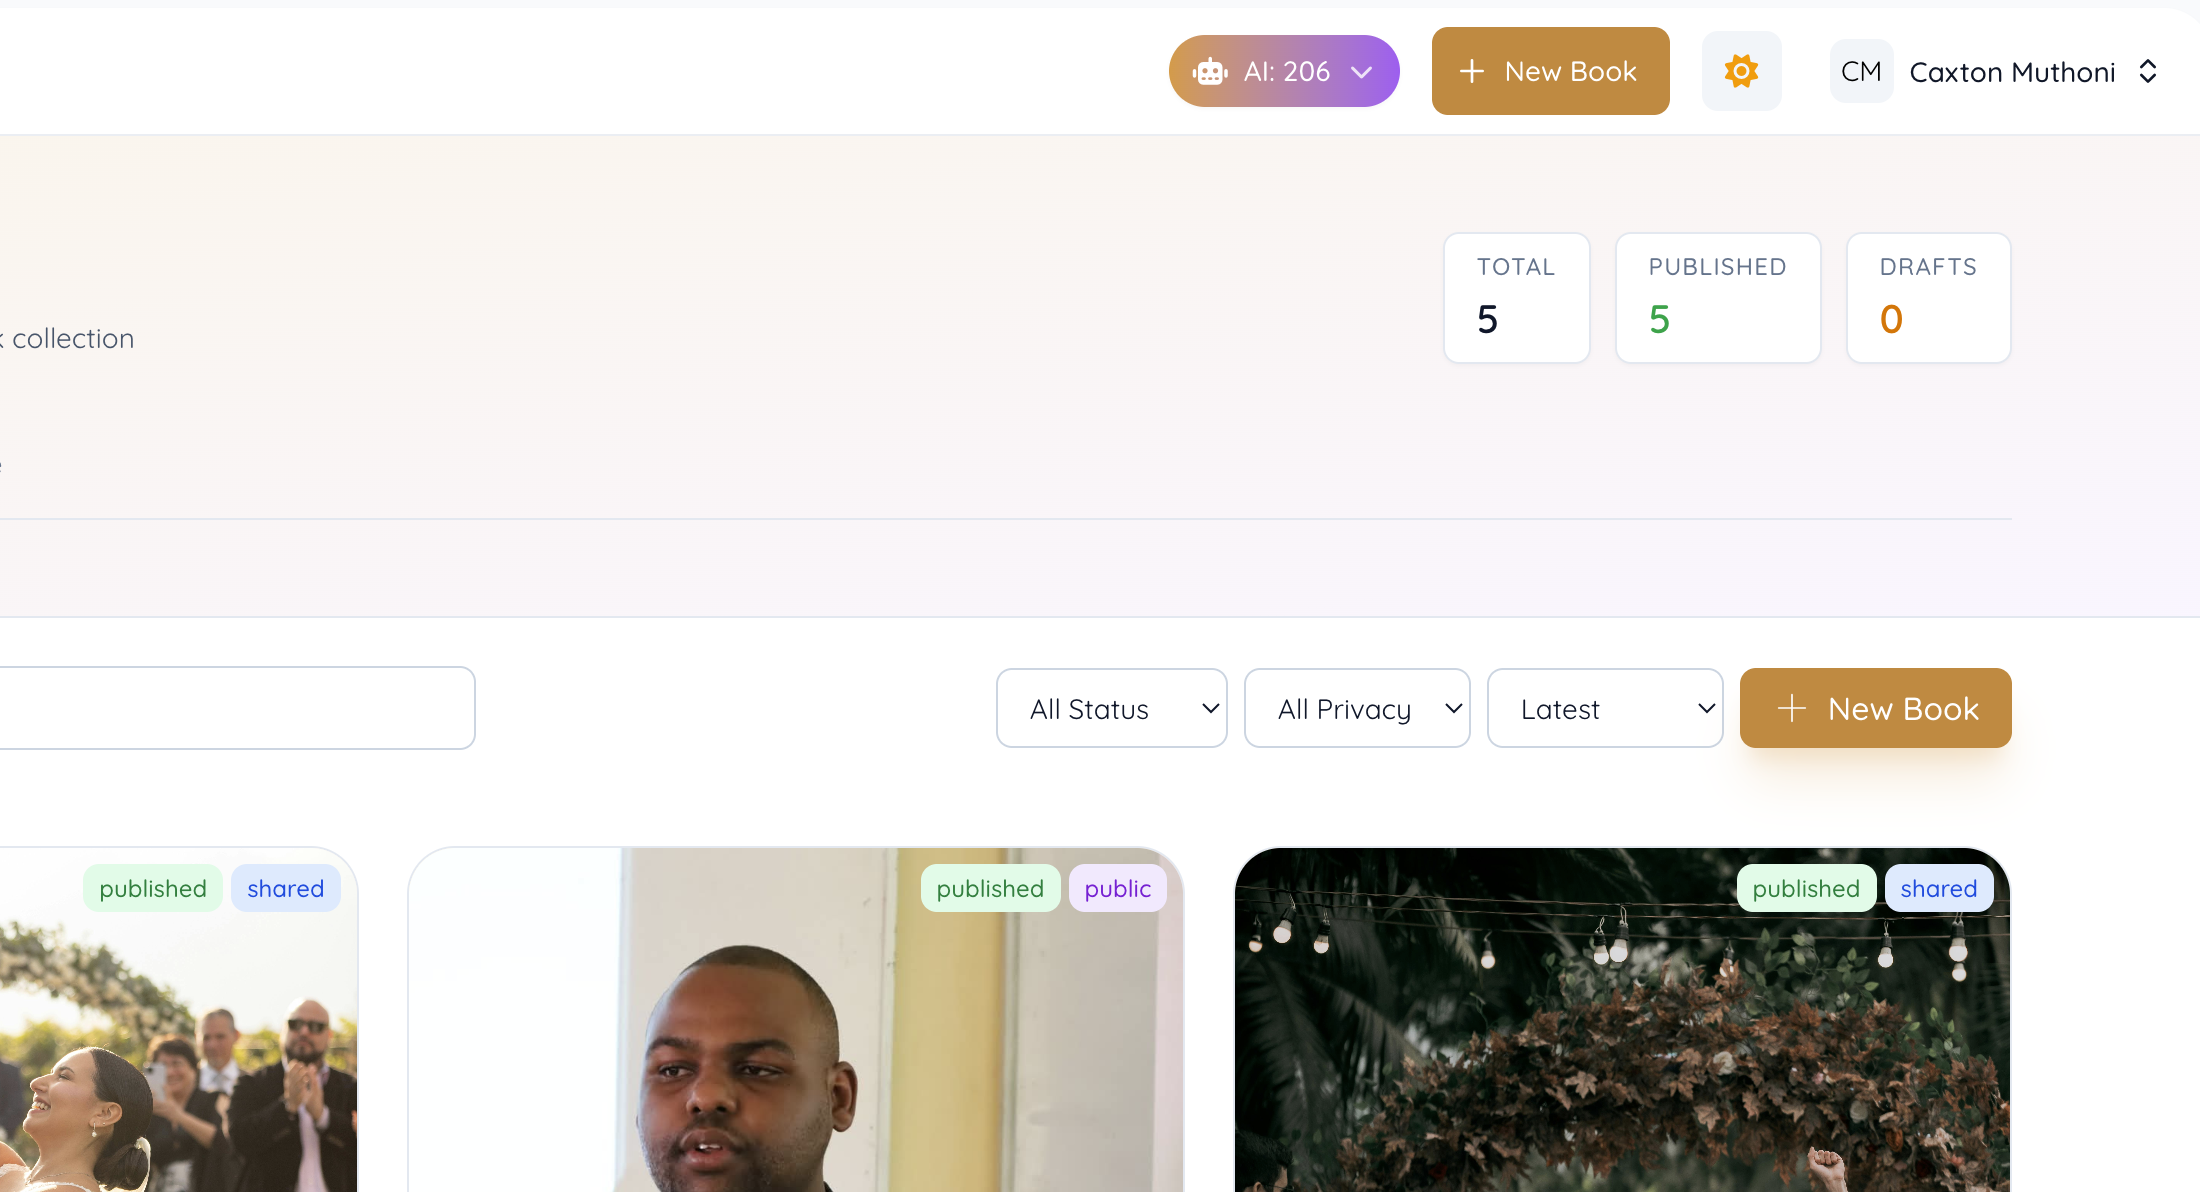
Click Create New Book
Start your journey by clicking the "Create New Book" button. You'll find this button either on your dashboard or in the books list page. It's your gateway to preserving precious memories.
Pro tip: Have your photos and ideas ready before you start - it makes the process smoother!
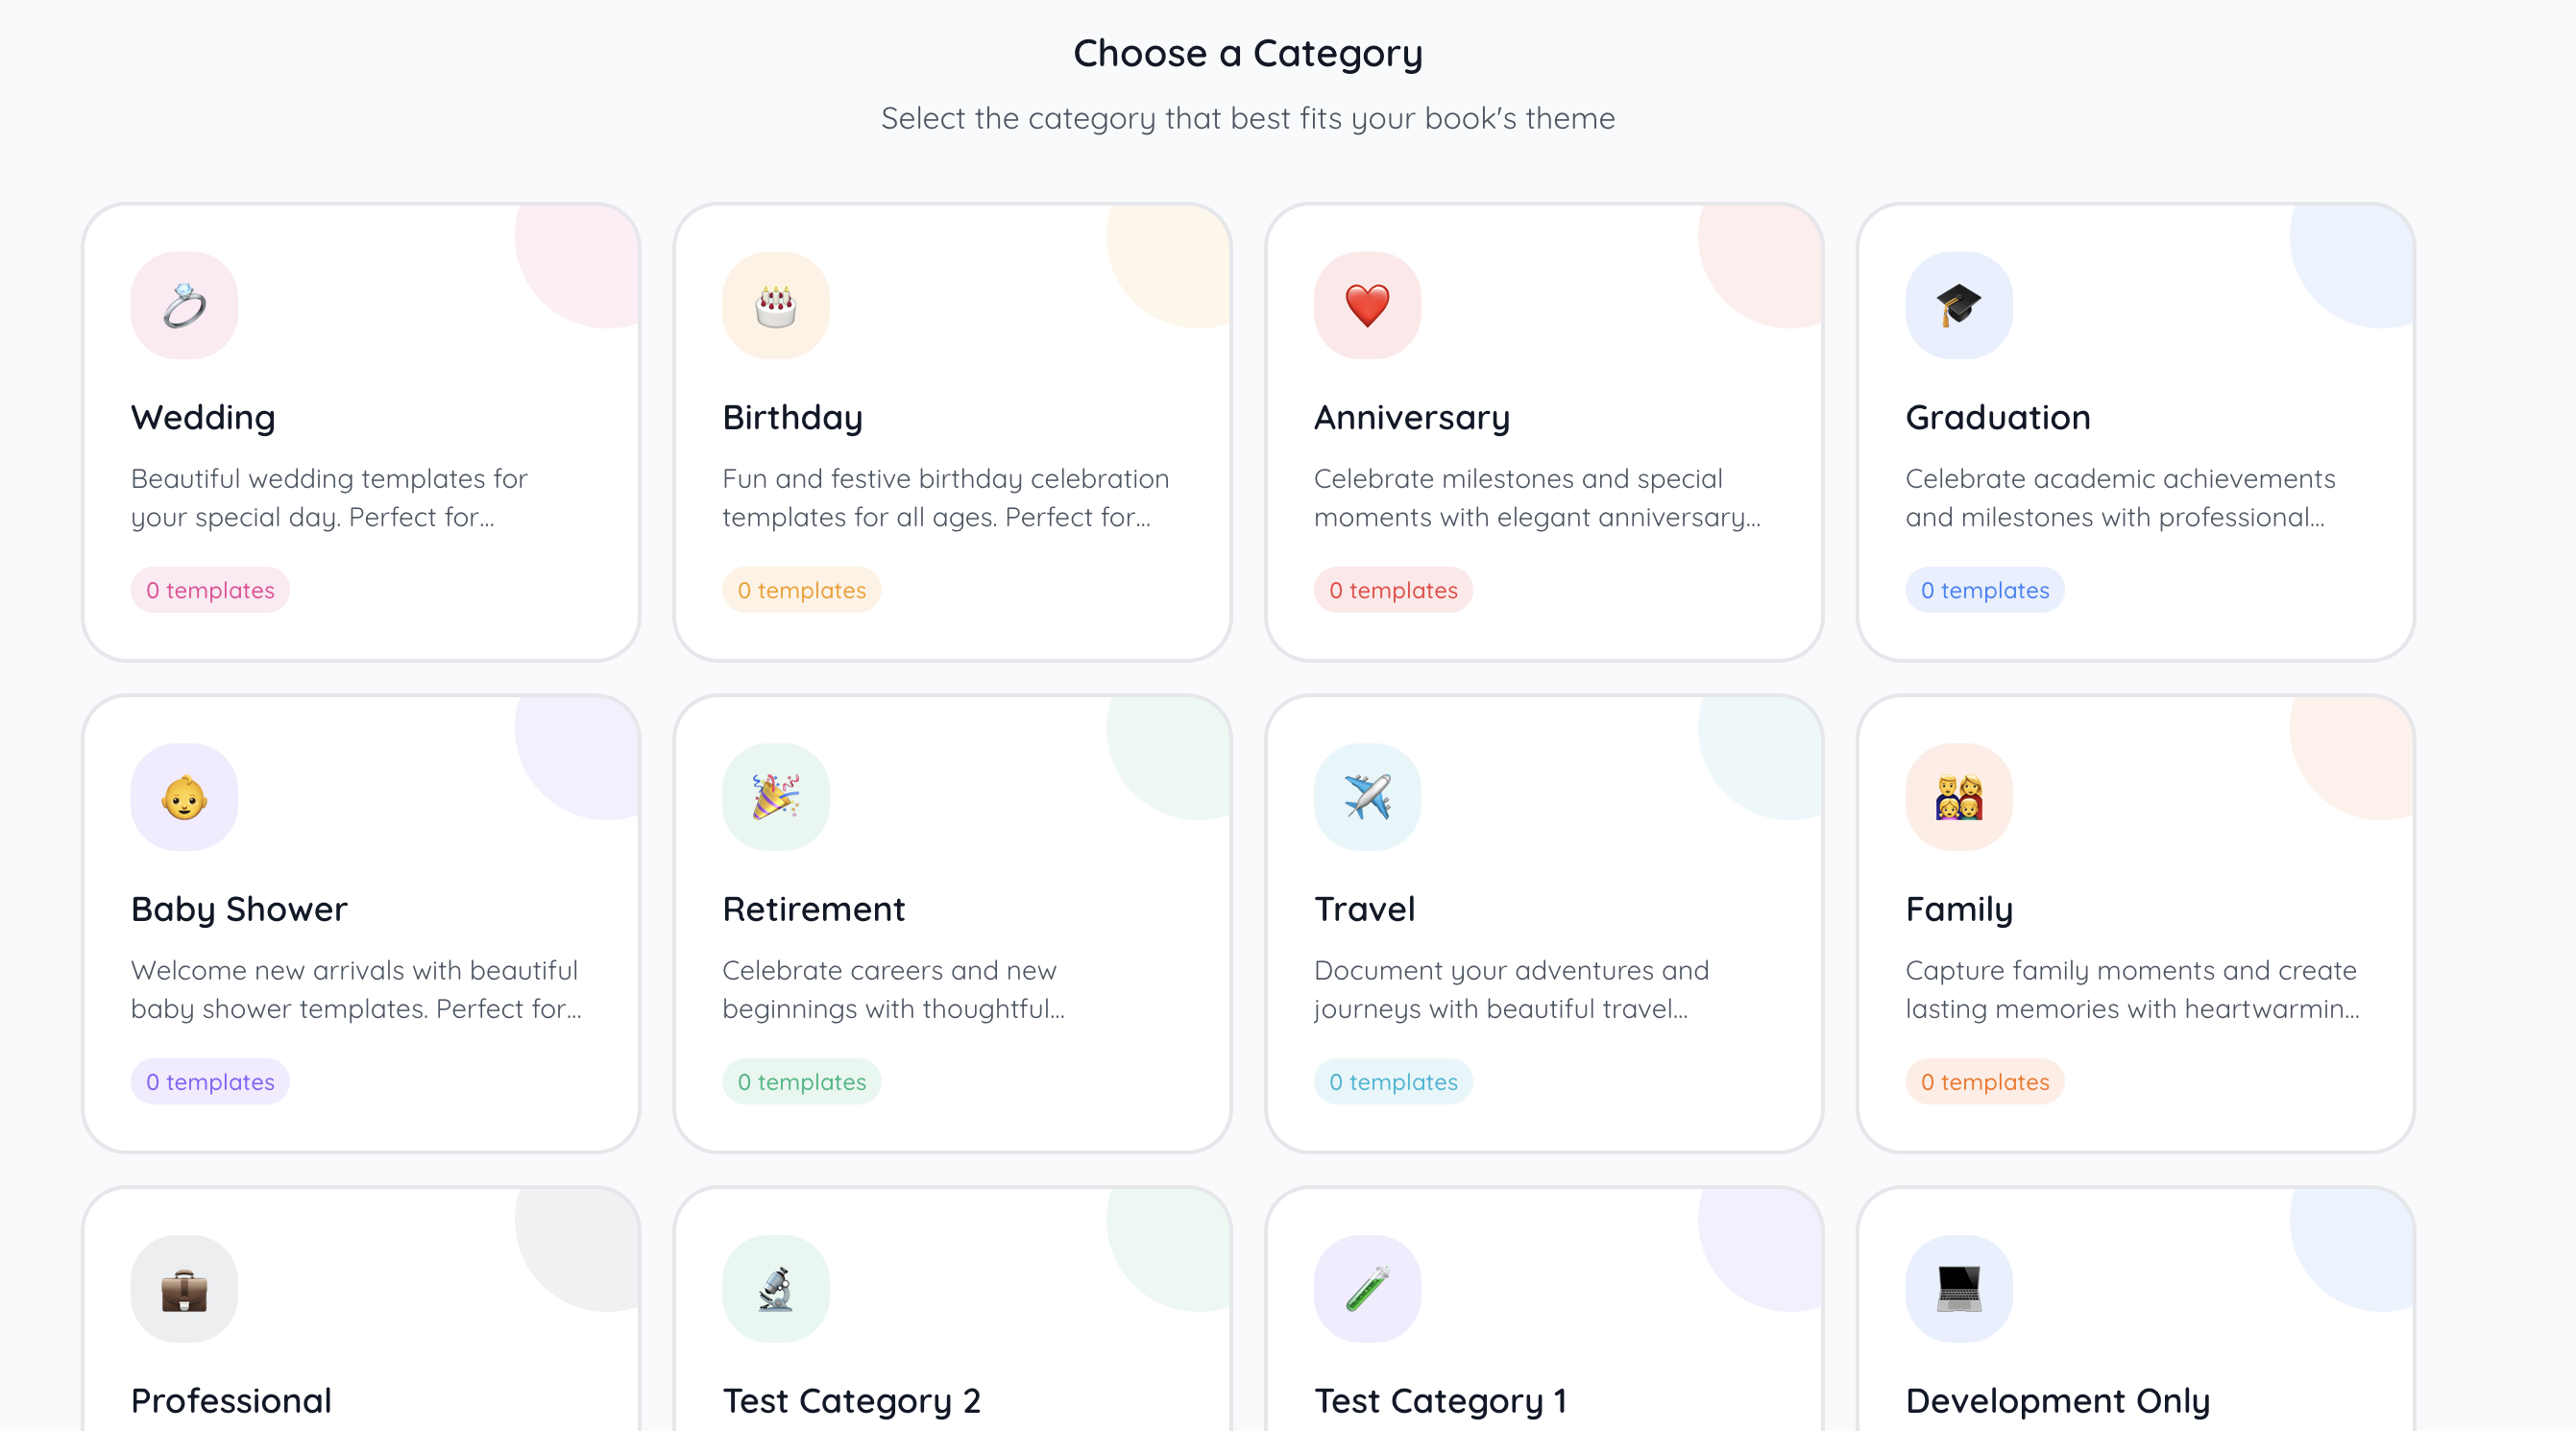
Select Book Category
Choose from a variety of celebration categories including:
Select the category that best matches your celebration to get relevant templates and suggestions.
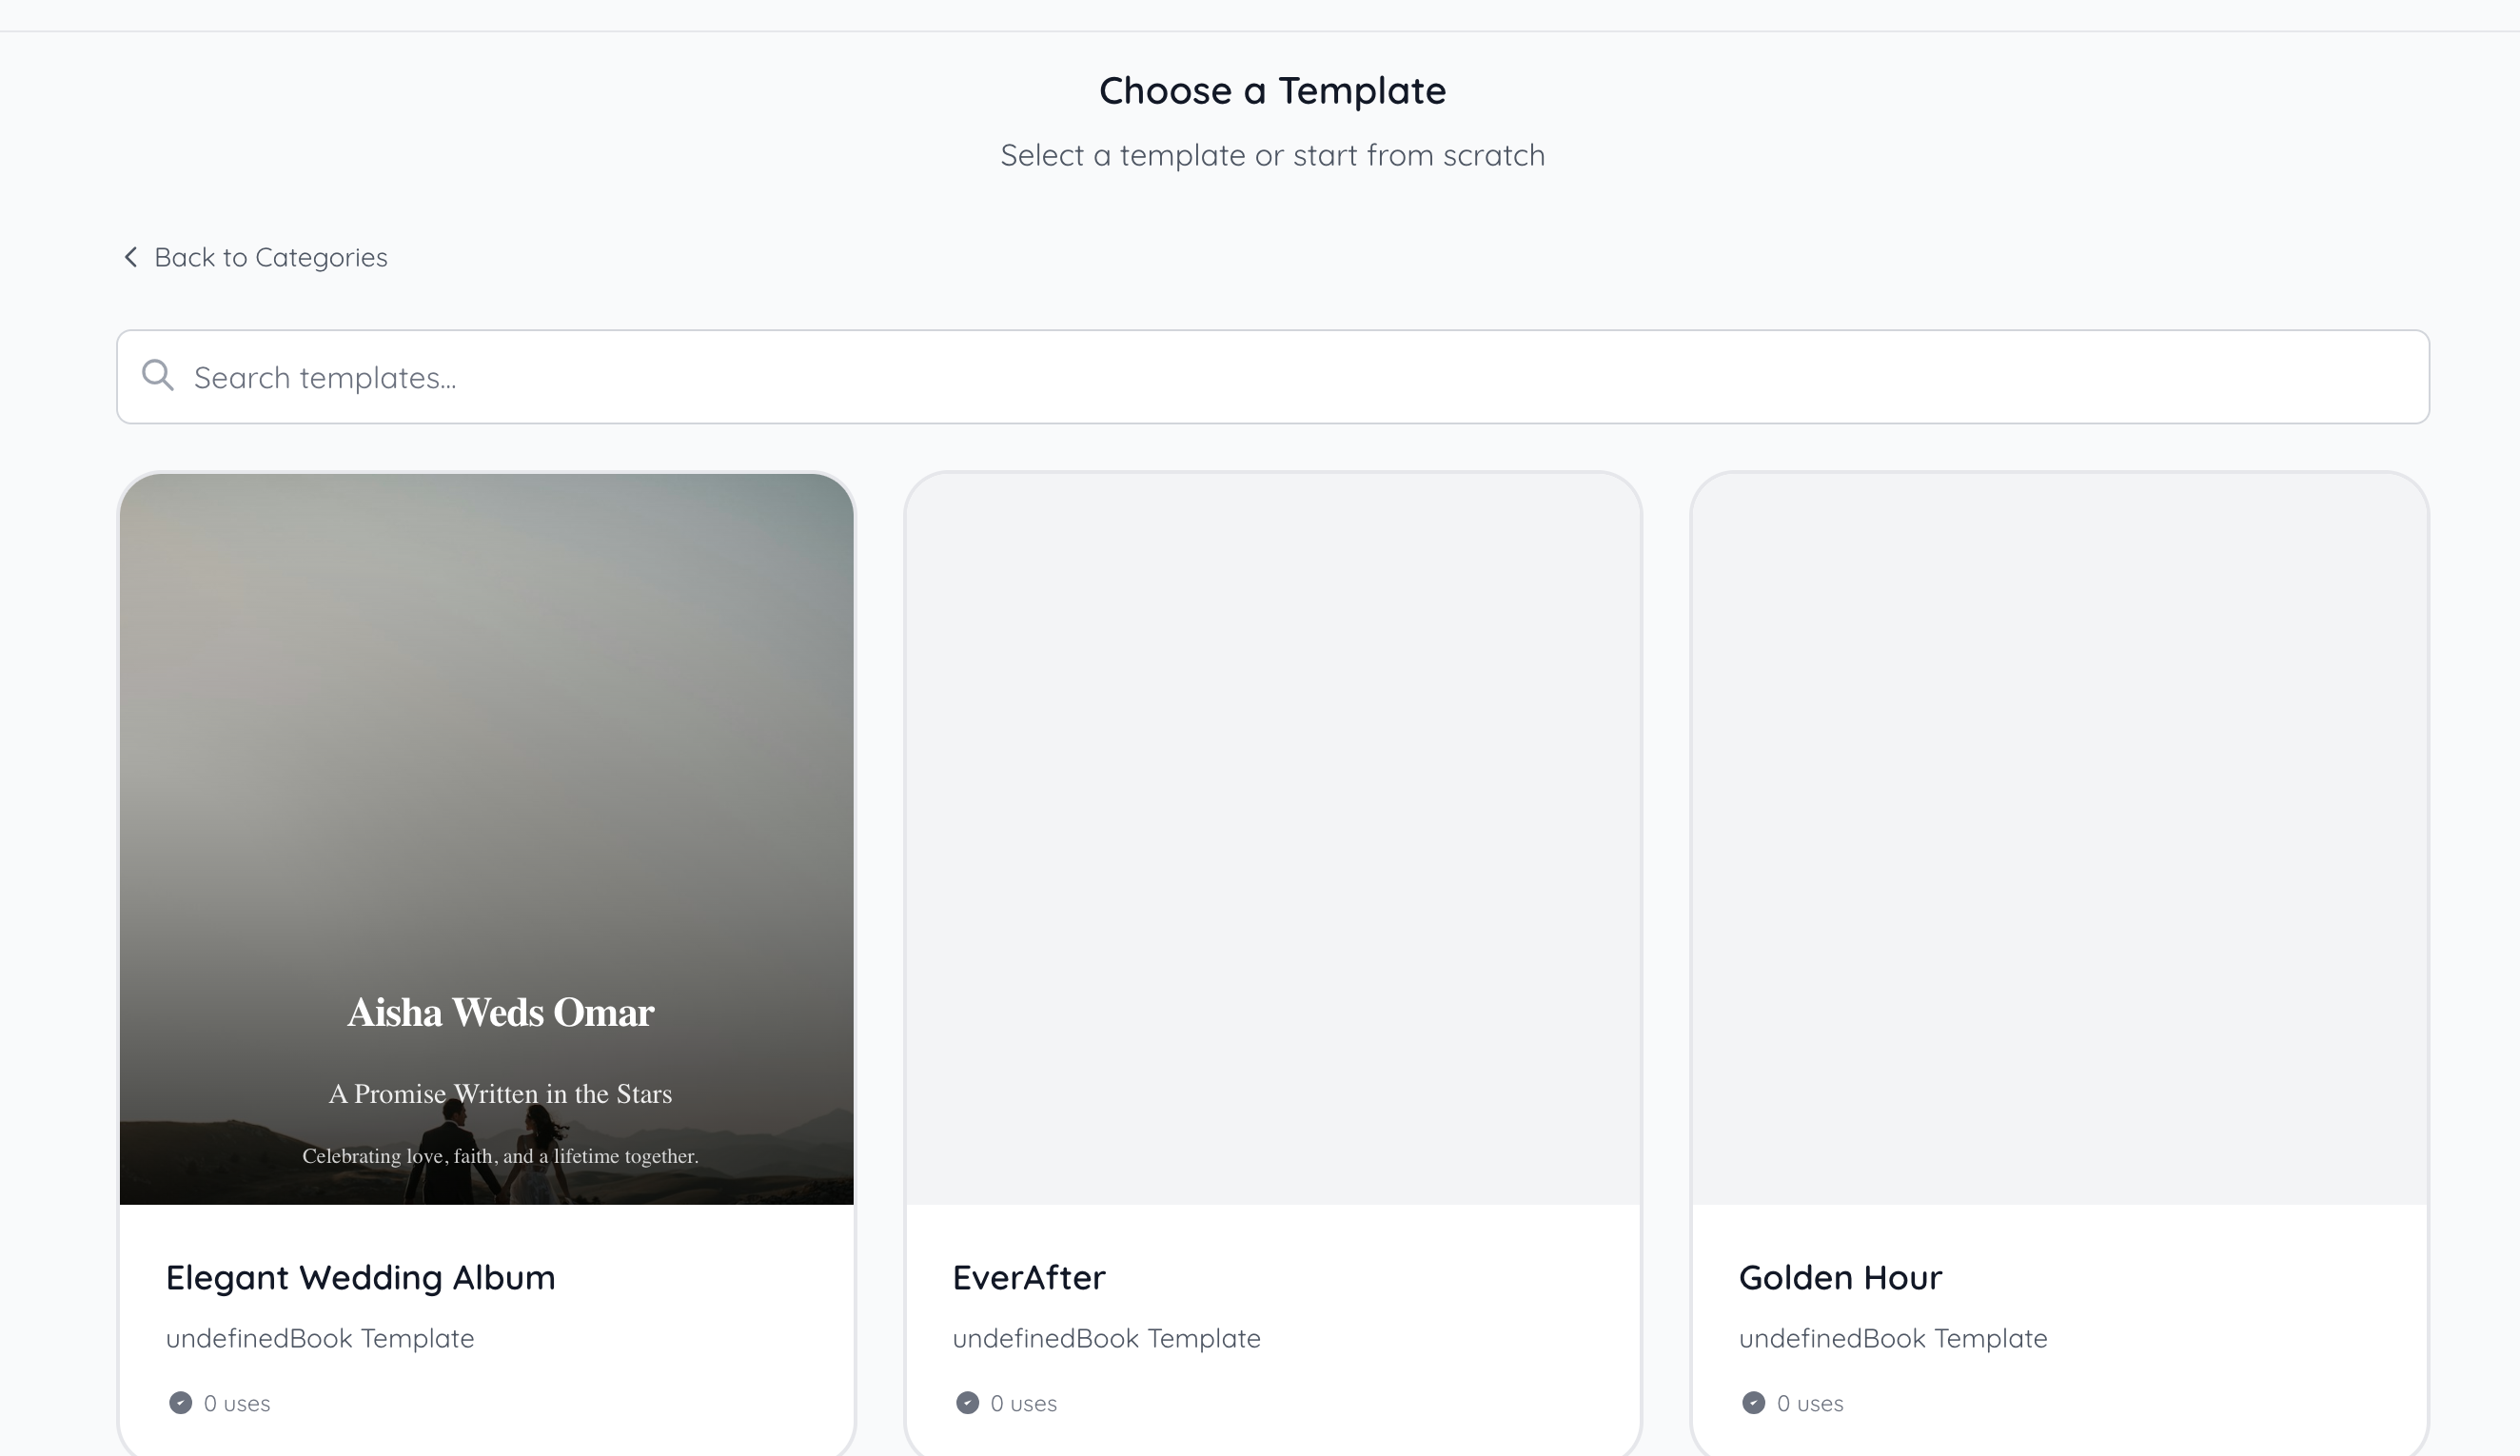
Select Template
Browse through our collection of professionally designed templates. Each template offers a unique layout and style for your book. Pick the one that resonates with your vision.
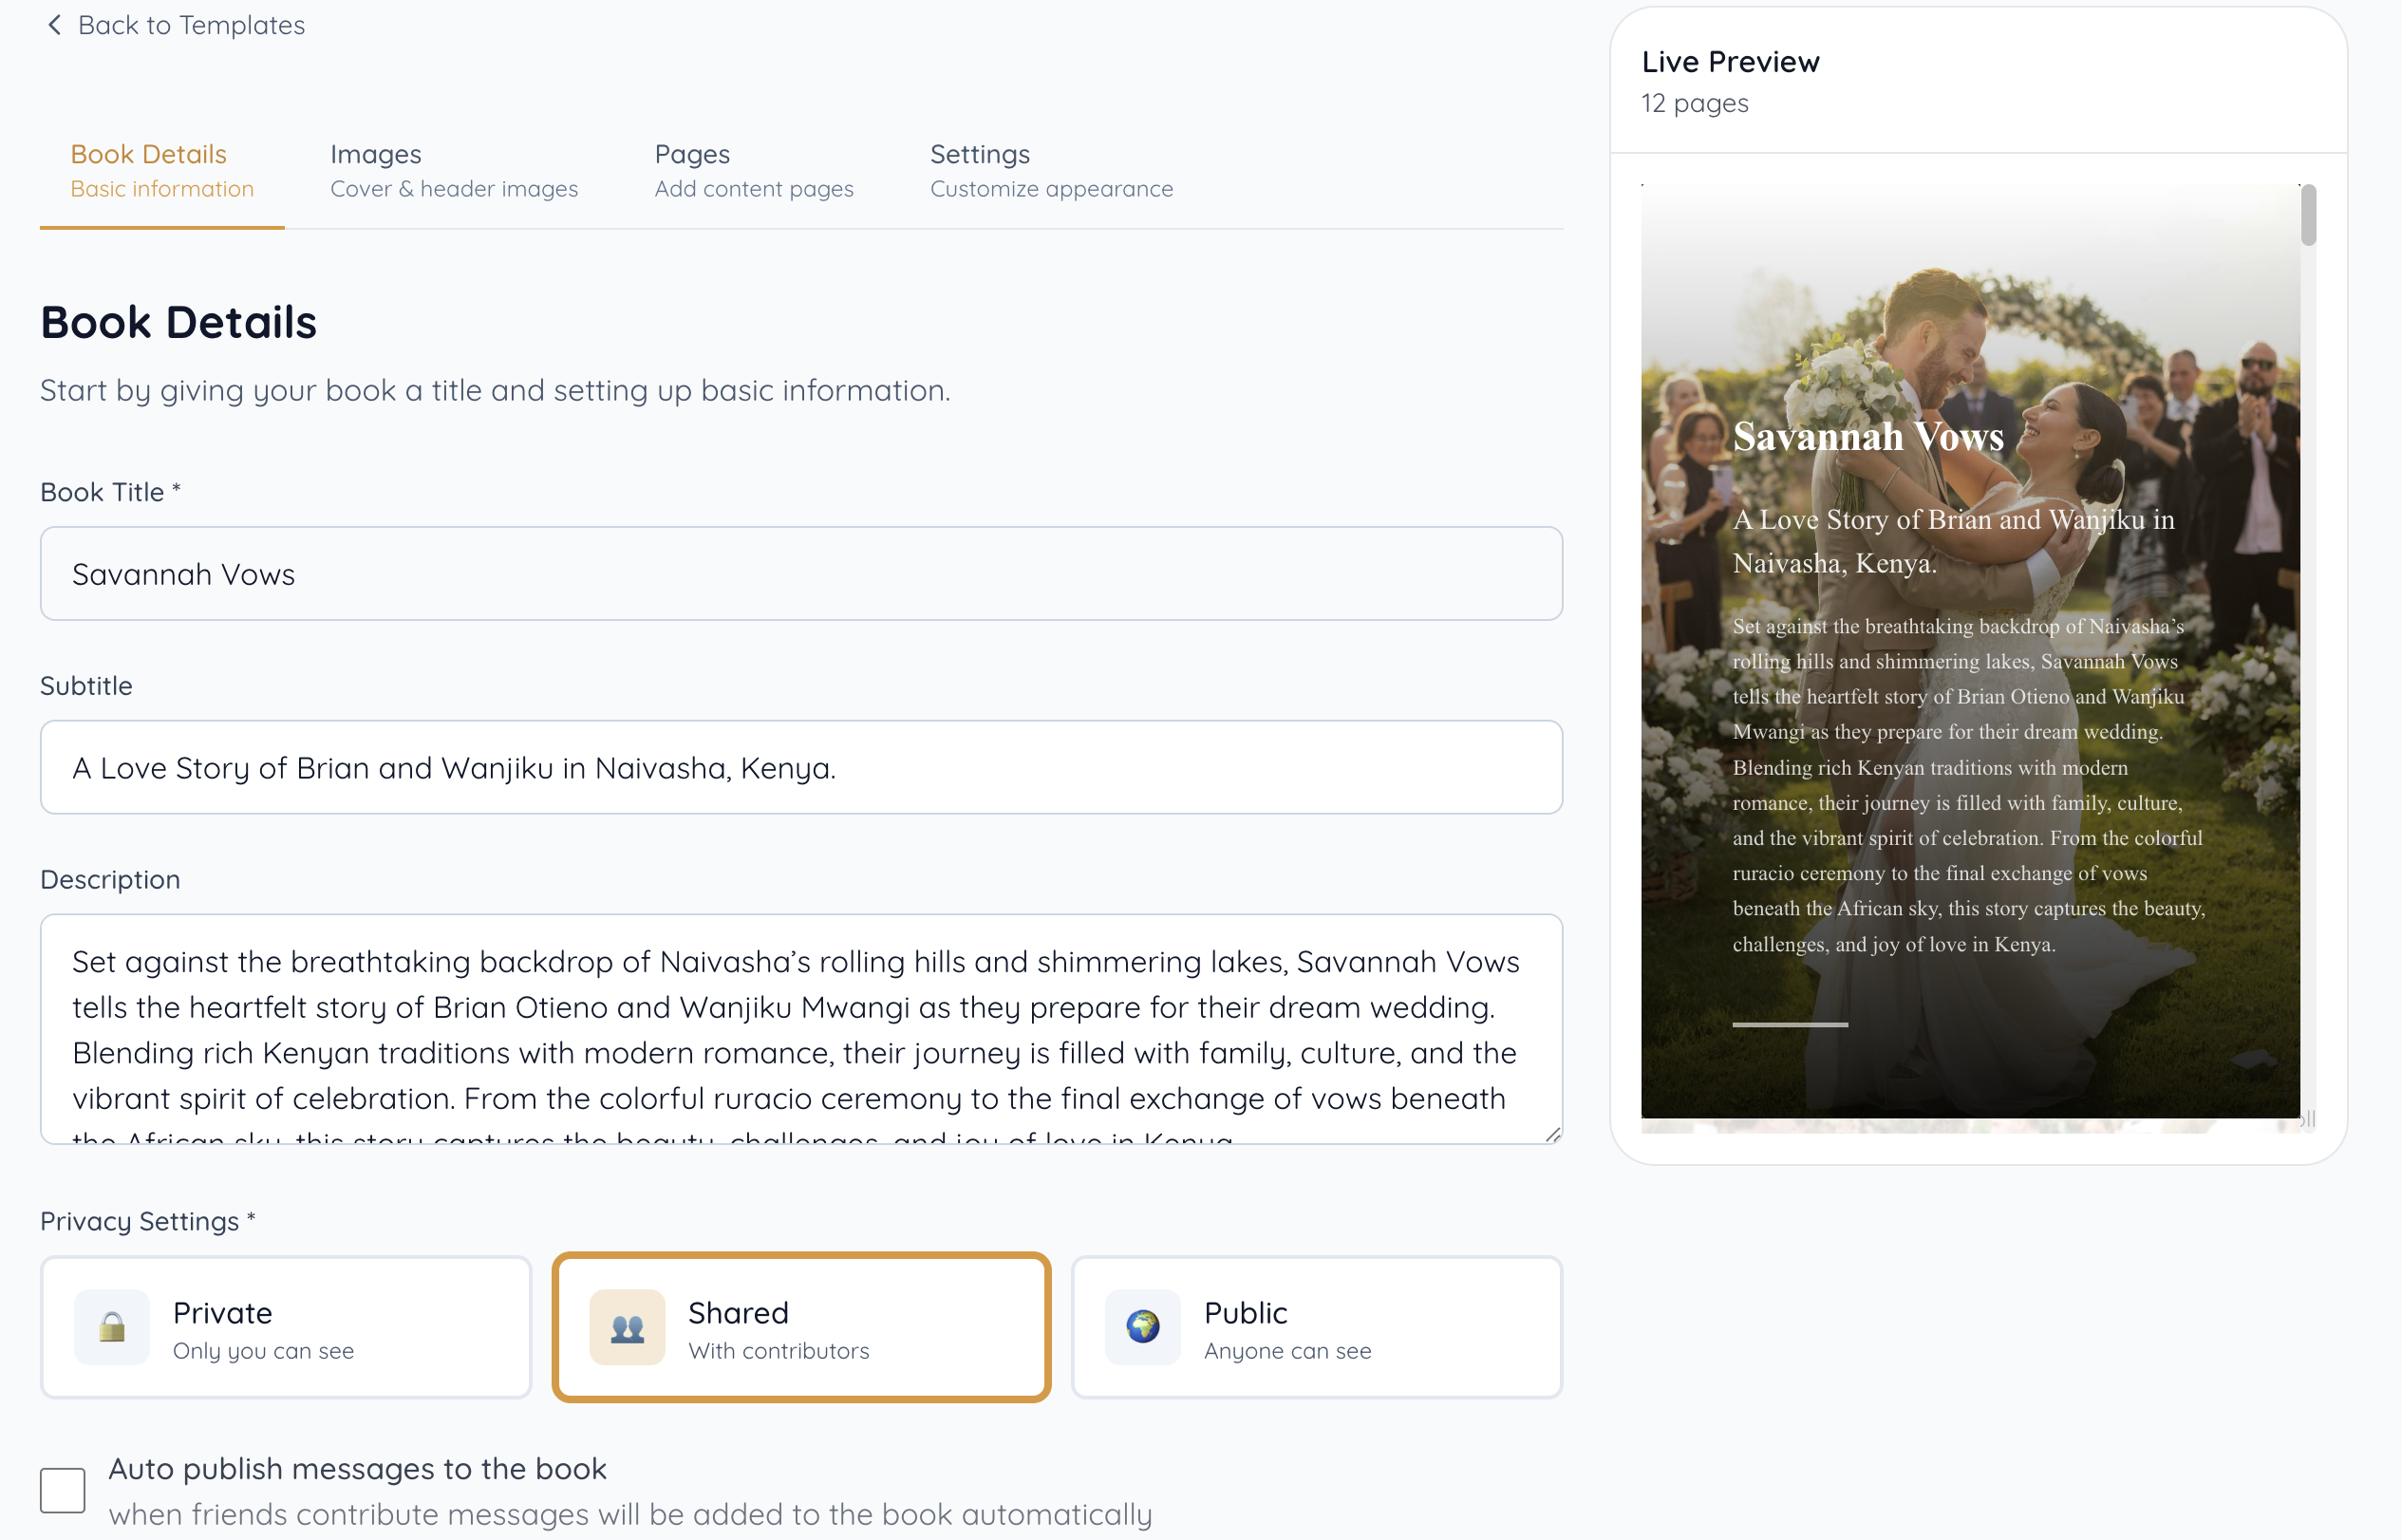
Enter Book Details
- Title: Give your book a memorable name
- Subtitle: Add a brief description
- Description: Share more about your celebration
- Privacy Settings: Choose who can view your book
Privacy options: Public (everyone), Shared (invited users only), or Private (only you)
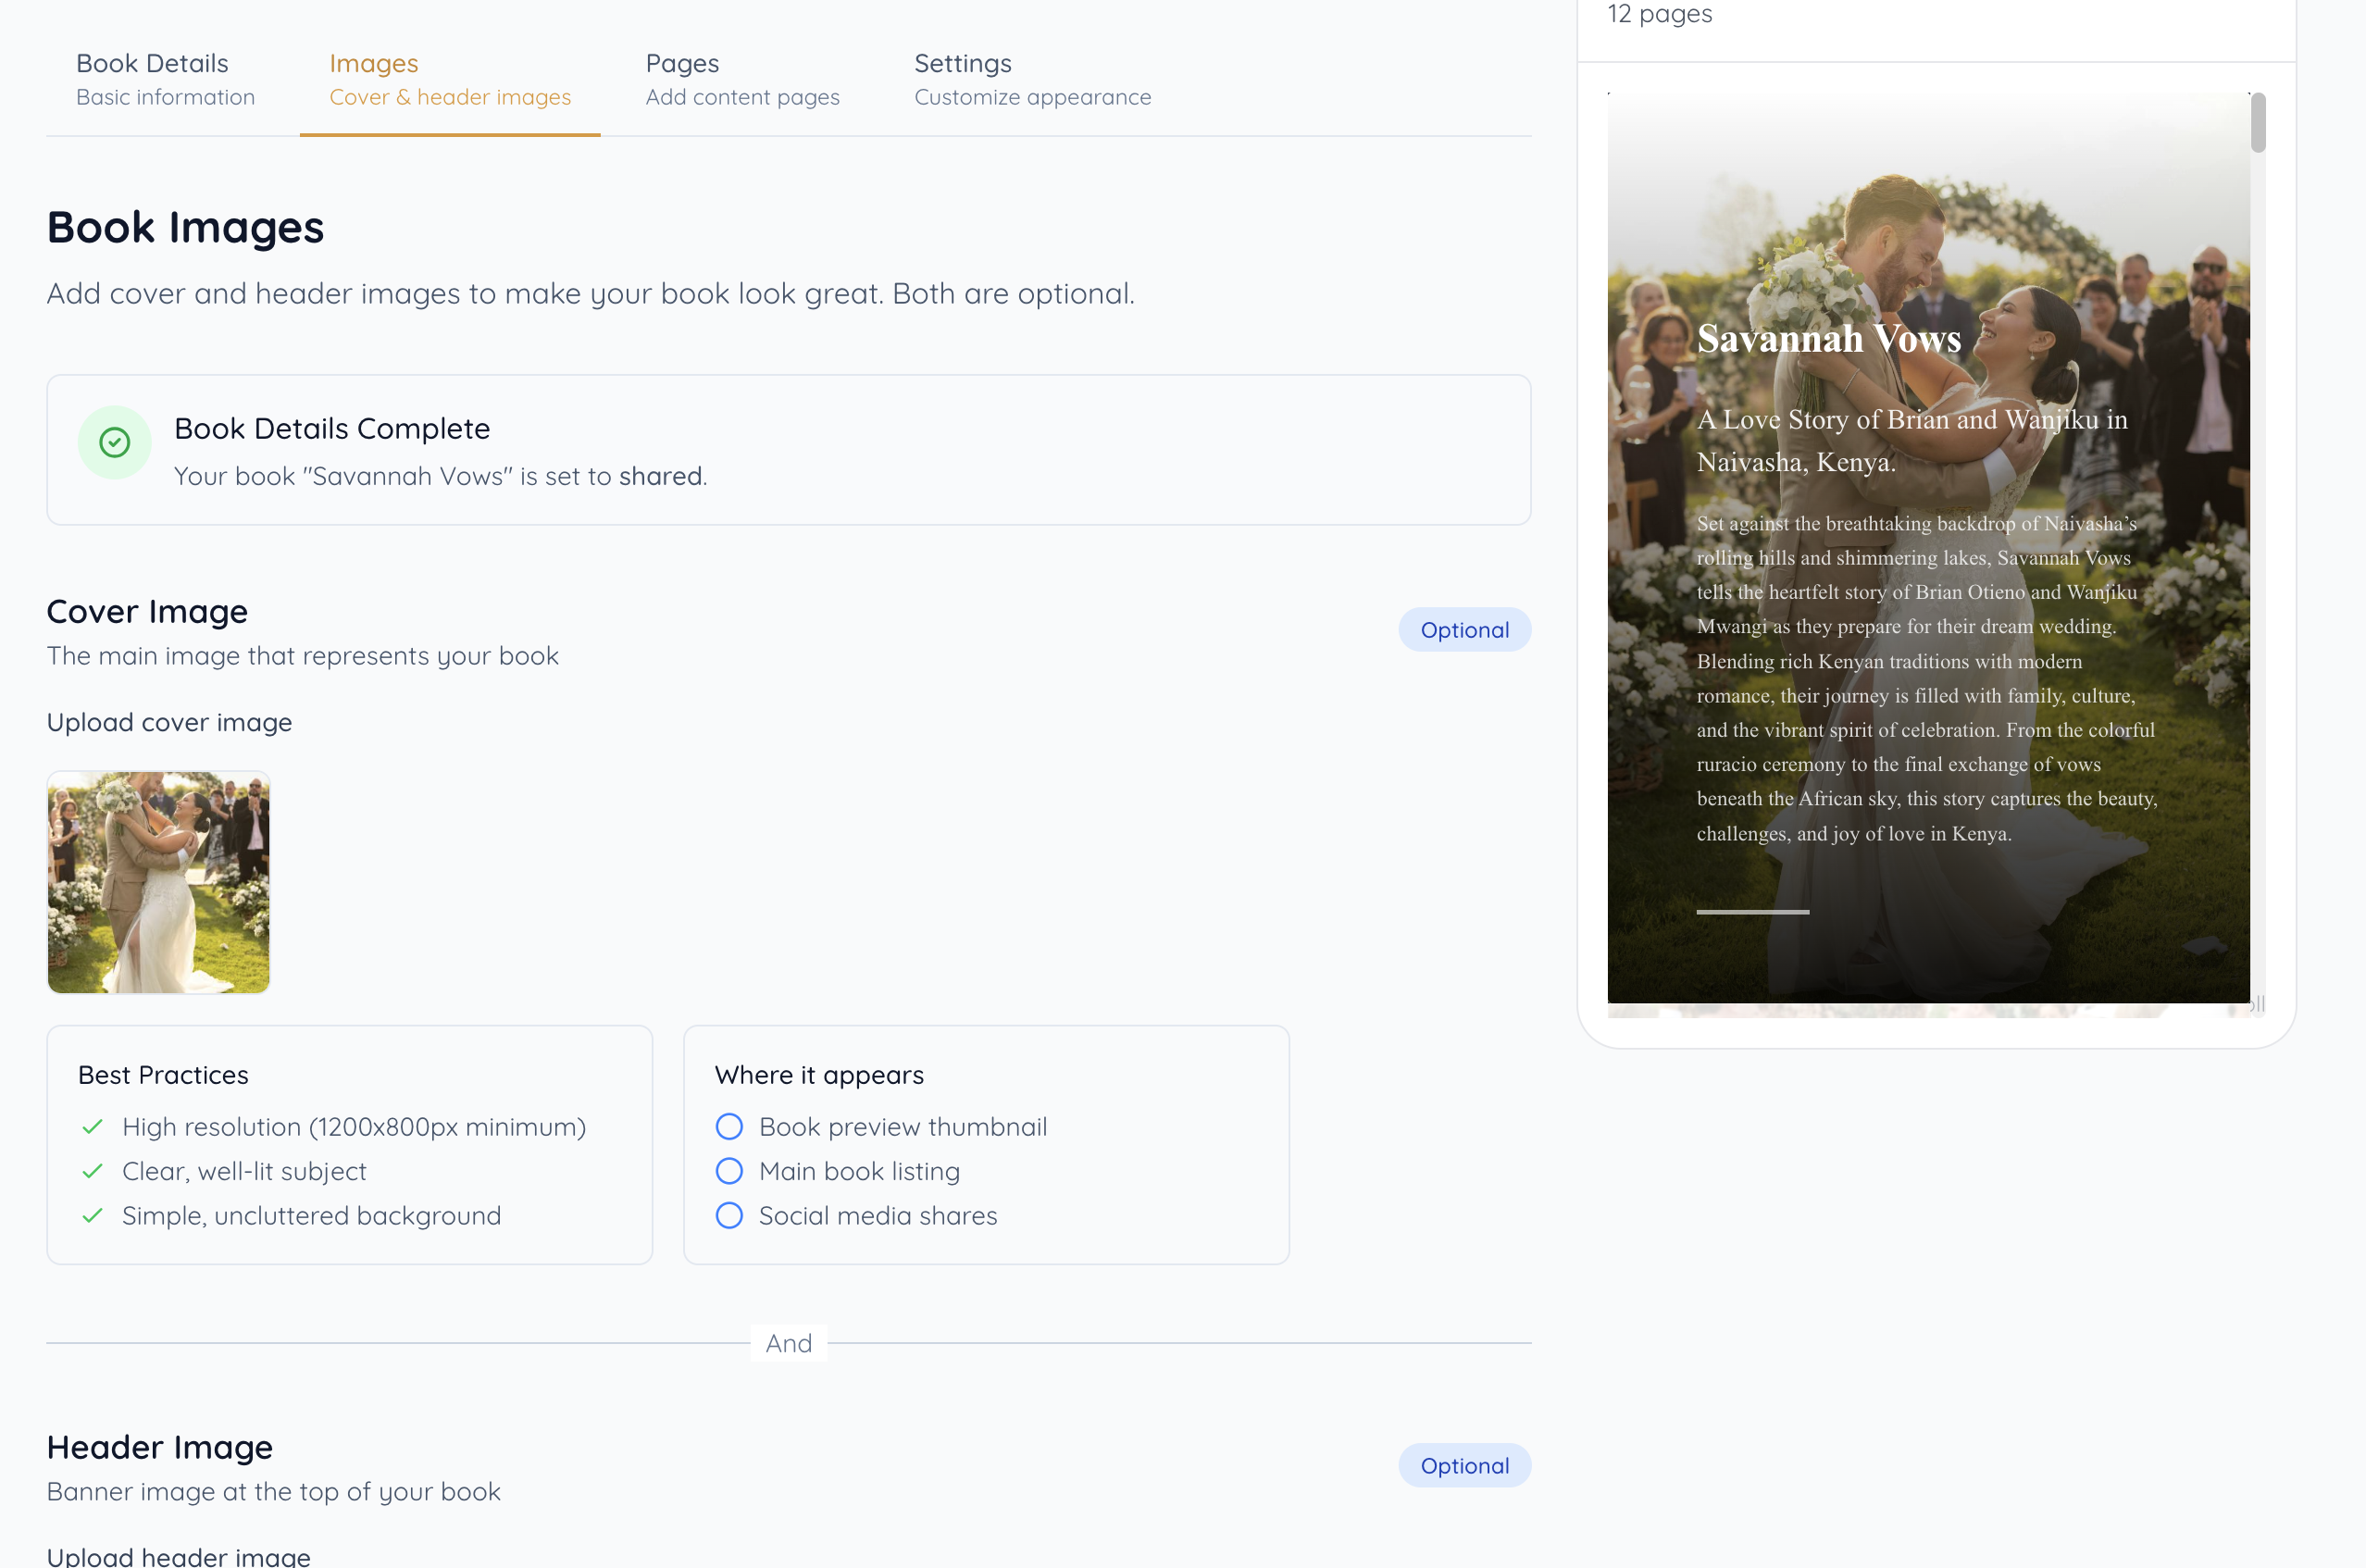
Add Book Cover & Header Images
Make your book visually appealing by adding a cover image and header images. This step is optional but highly recommended to give your book a personal touch.
Drag & drop or click to upload images
Create Your Book Pages
Choose between manual creation or let our AI help you generate content
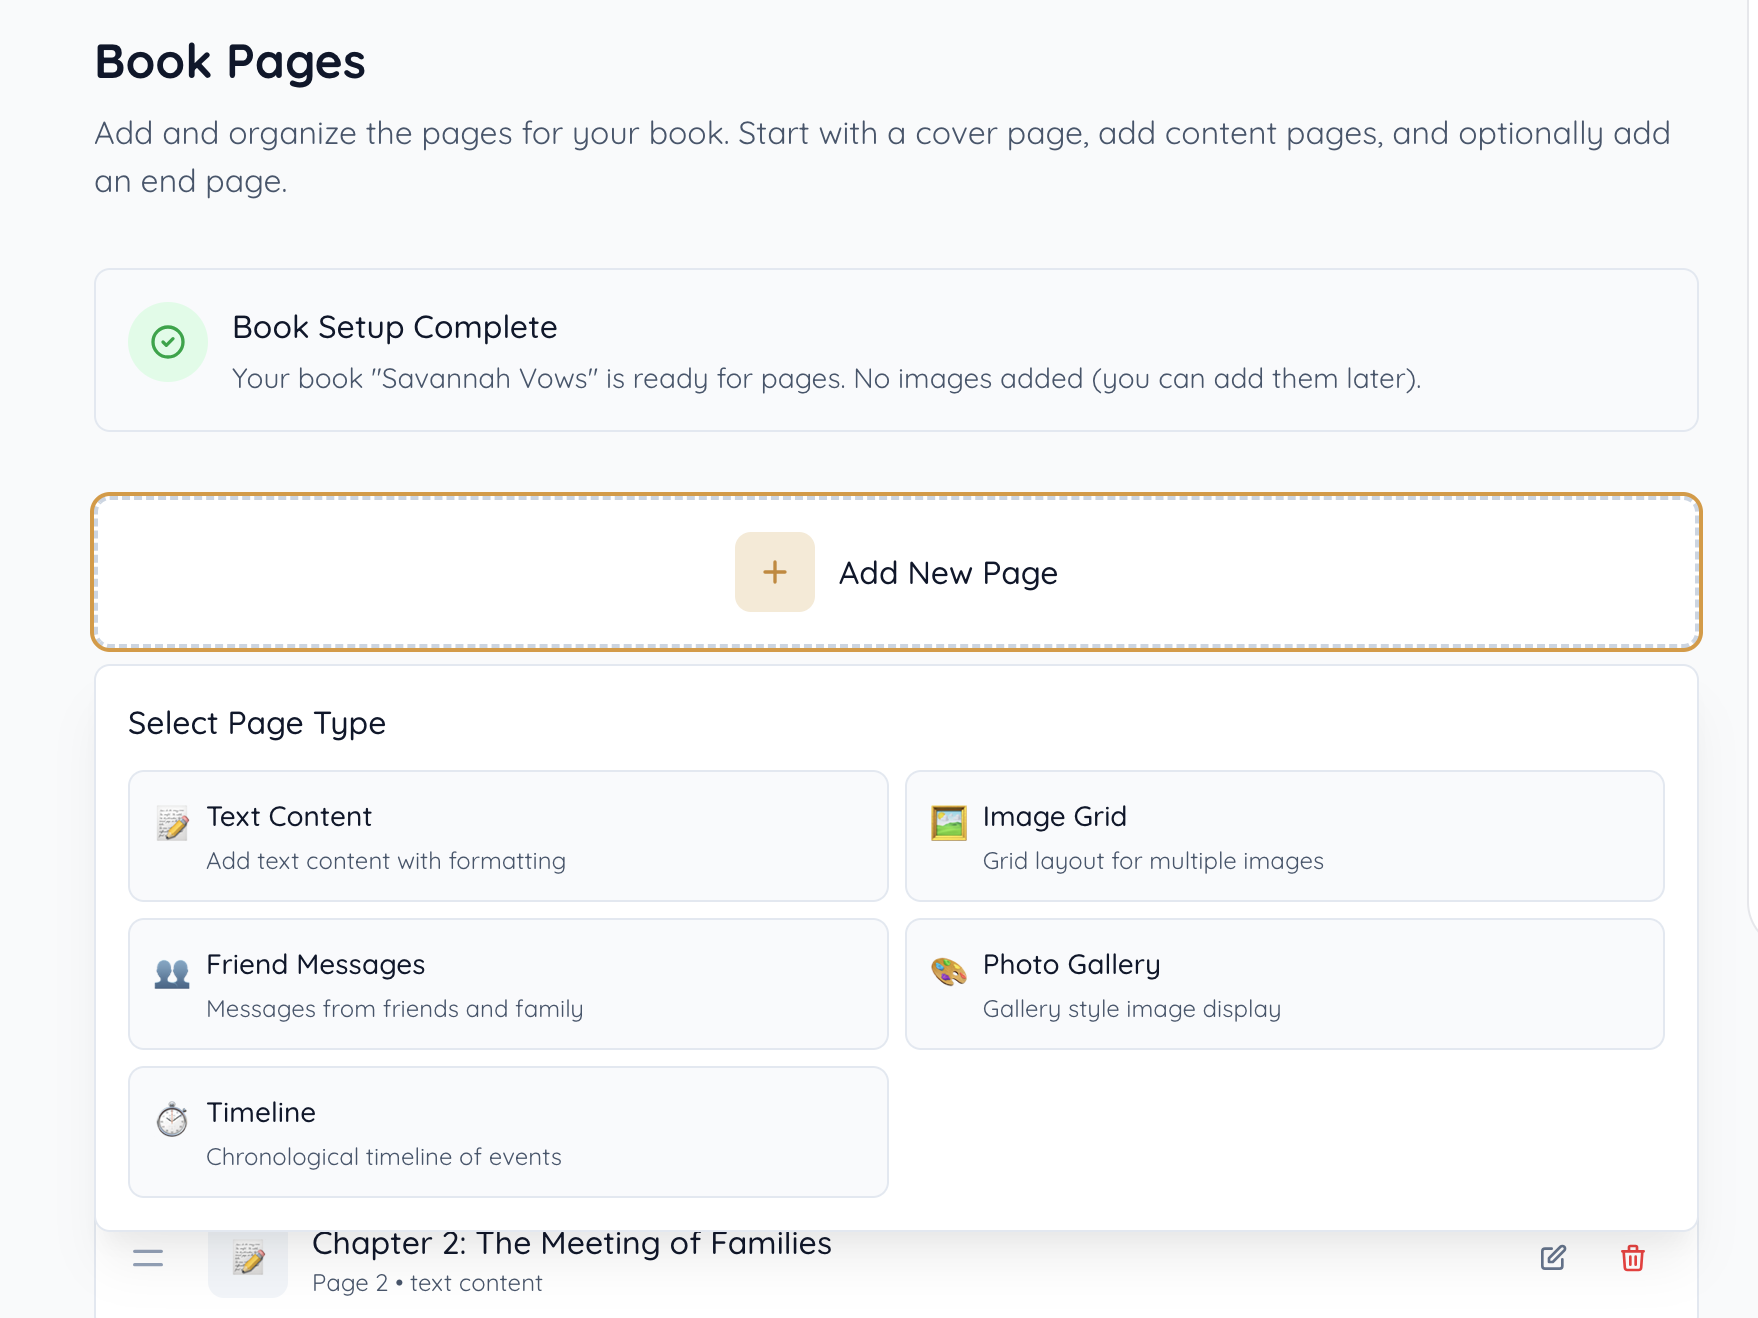
Create Manually
Click on "Add New Page" to add a page
Select page type: TextImagesFriend Messages
Click "Edit" to edit page contents - add title and content, then save
Repeat to add more pages
Delete pages using the trash icon button
Create with AI
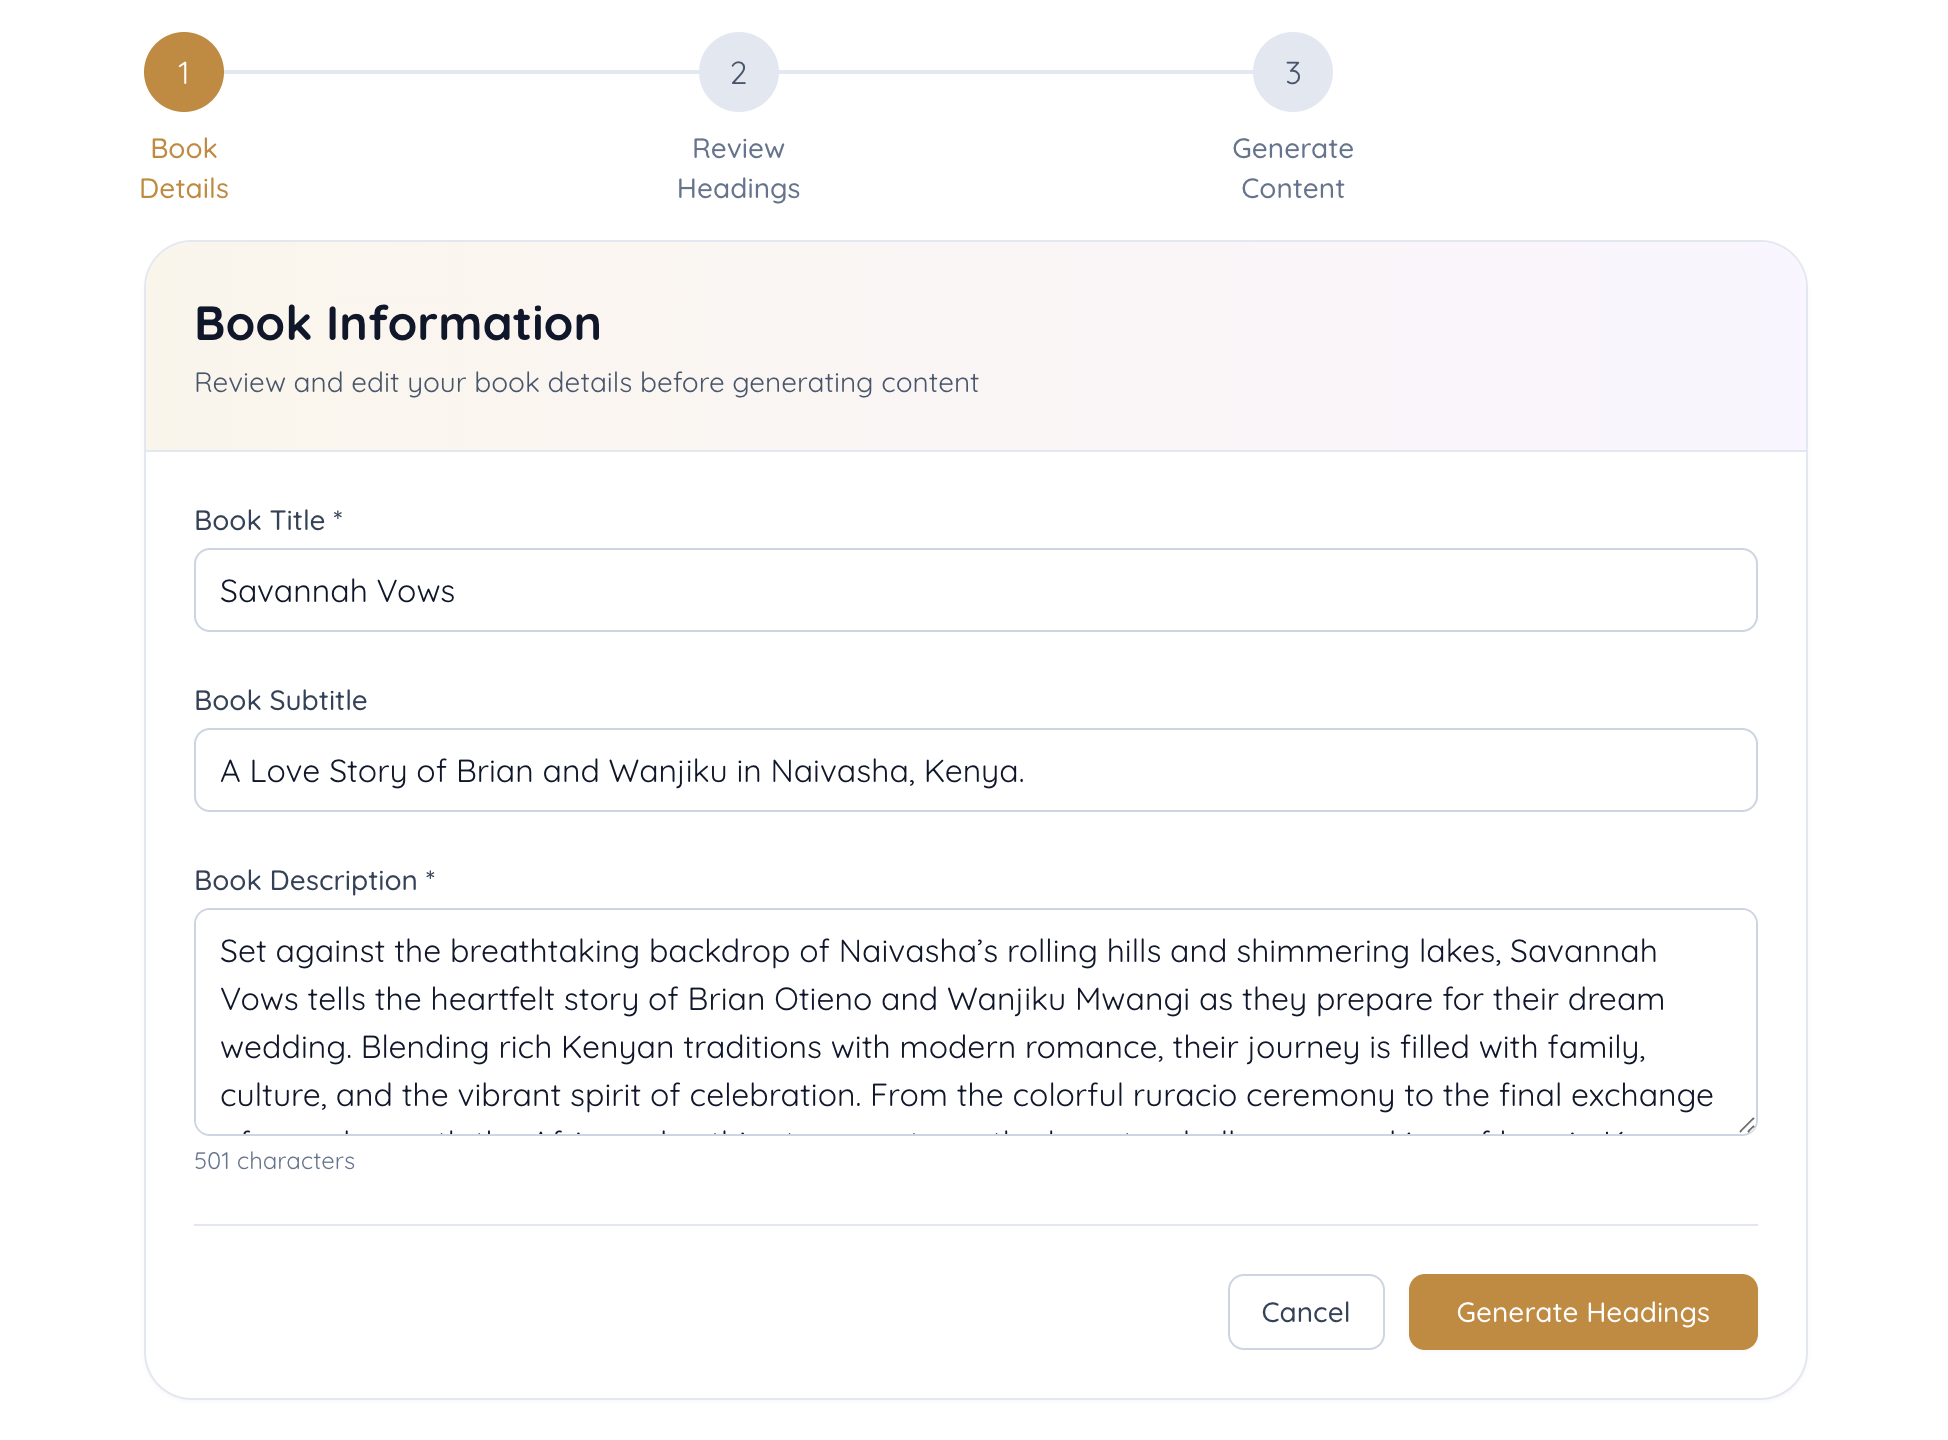
RecommendedClick "Generate with AI" button at the top
Confirm book details and click "Generate Headings"
AI generates headings - you can delete or update any
Click "Continue to Generate Content" - AI creates full book content
Preview & Publish Your Book
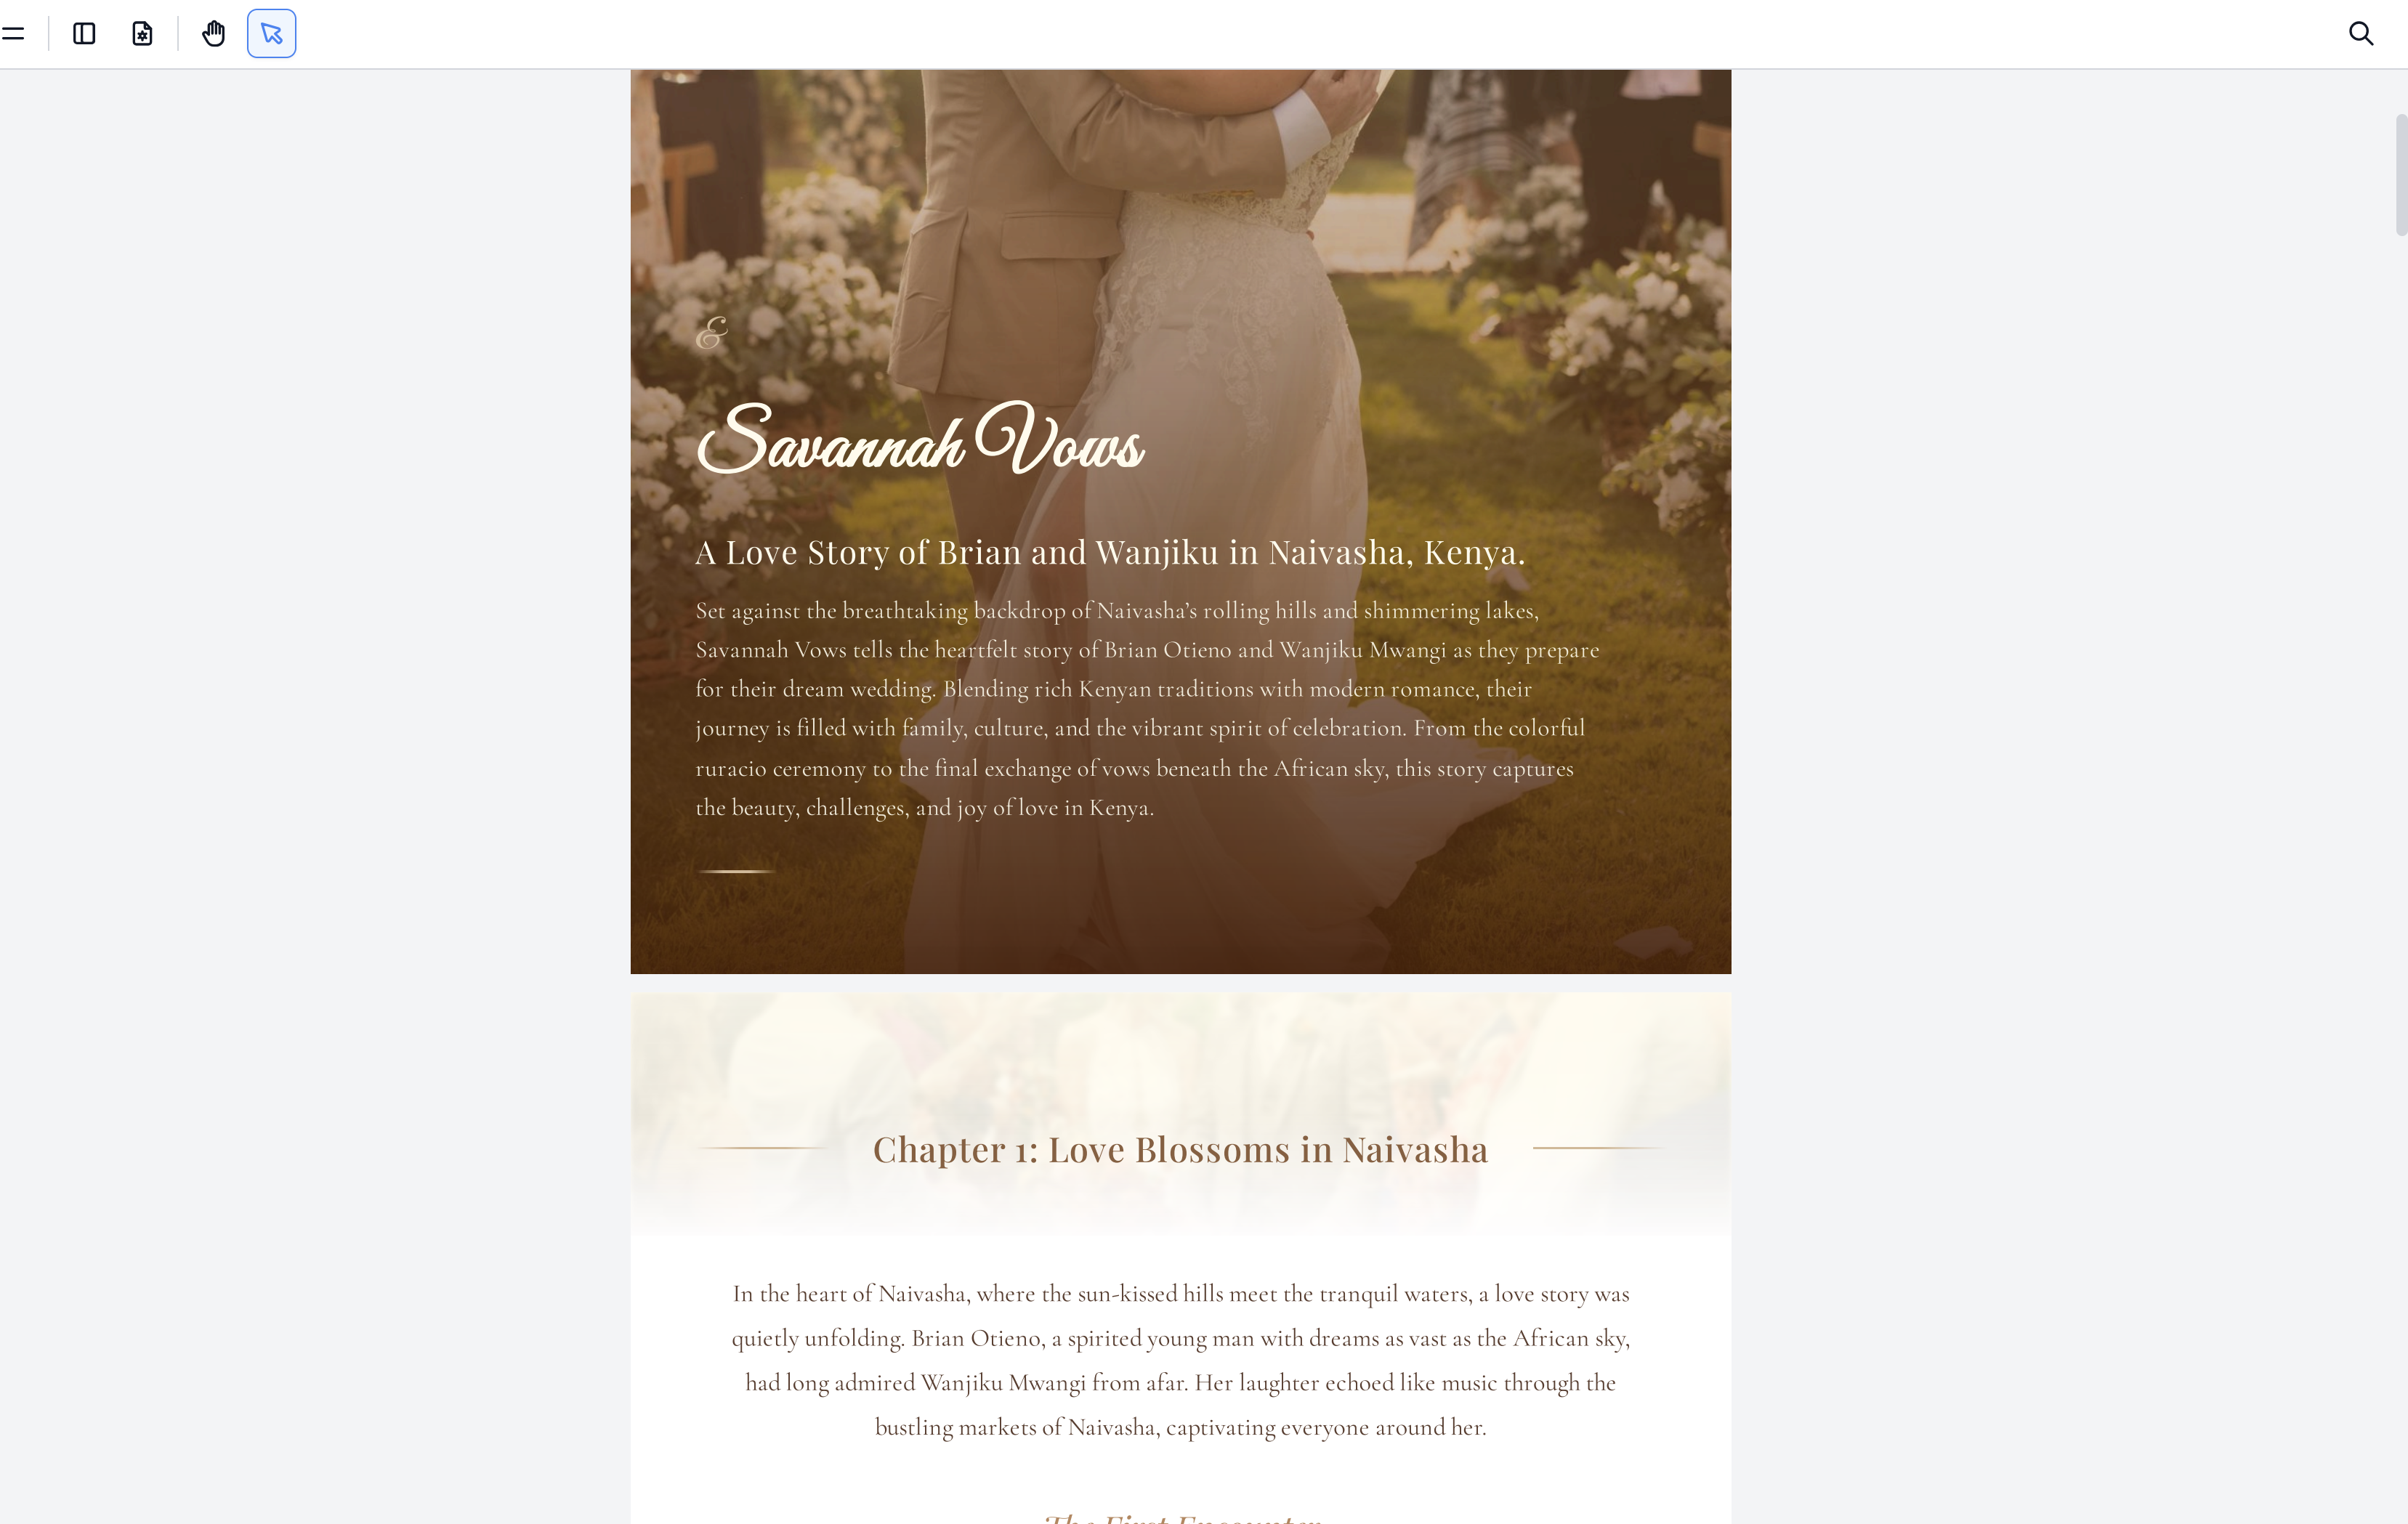
Once you've finished creating your book, use the buttons at the top of the edit page to:
Publishing makes your book available according to the privacy settings you selected.
Share Your Book & Invite Friends
Only Public and Shared books can be shared with friends for contribution
Sharing a Public Book
- On My Books page, click "Read Book"
- At the top, click "Share Book"
- A popup appears to select platform or copy link
Inviting Friends to Contribute
- On My Books page, click "Read Book"
- Click "Share Privately" button
- Add recipient details: name, email, personal message, expiration date
- View all invitations on the Private Shares page
Public
Visible to everybody
Shared
Only invited users can see
Private
Only you can see
Contribute & Manage Messages
To Contribute to a Book
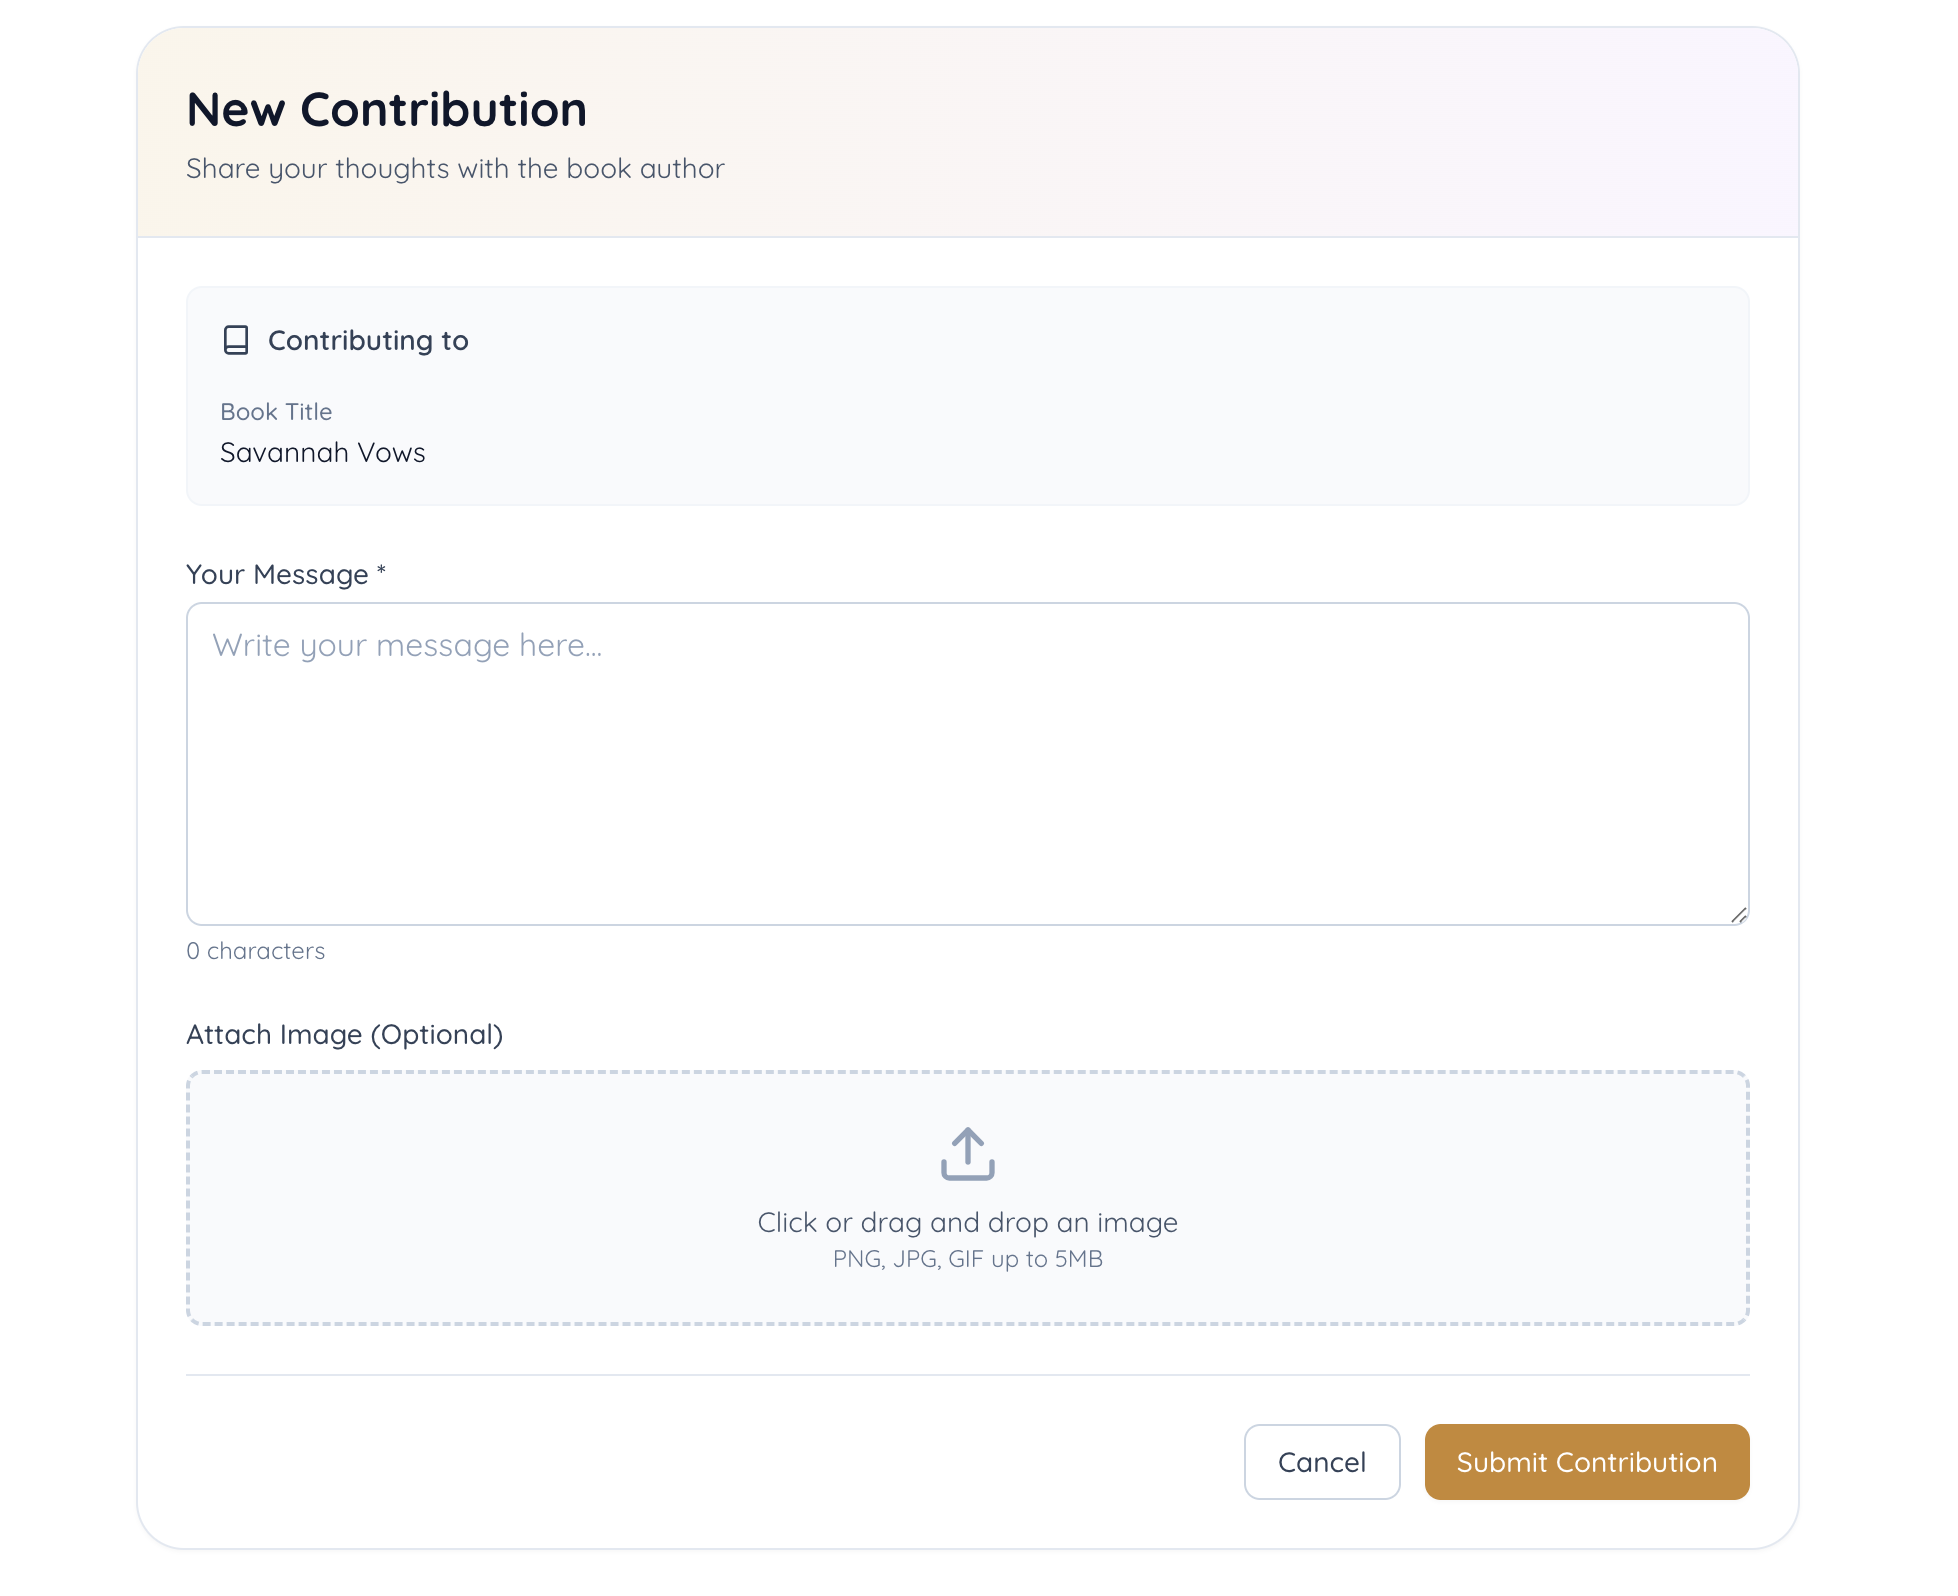
Click on the shared link or click "Add Message" on the book's reading page, then add your message and an optional image.
View Contributions
Click on "Friends Messages" and choose between tabs:
- Messages to my book - You can approve or reject messages
- My messages - Messages you've contributed to others' books
Ready to Create Your Celebration Book?
Start preserving your precious memories today
Create Your First BookNeed help? Check our FAQ or Contact Support
Contact us
Need help? Get in touch with us.
Phone
+254 768 069 134
+254 738 121 484
info@mycelebrationbooks.com
Location
Westlands, Nairobi, Kenya